Shipping to the US is unfortunately impossible since the August 2025 tariffs announcement. I hope a solution will be found soon.
Thank you for your loyalty and all the best for your modelling projects!
Note that the remaining frame contains engraved information on which parts are what.
RAM Panels B/C and M versions
CAUTION: The Rafale M aft RAM panels have a small partial cut to better conform to the fuselage shape: be very careful when taking these parts off the backing sheet as you would break them otherwise!
Rafale MRafale B/CRafale M aft panel before overlay is positionned, note engraved teeth to help overlay panel positionningRafale M aft panel overlay – note horizontal scored line for foldingOverlay folded over scored line, adhesive side on the insideOverlay aligned with teeth scored in underneath panel
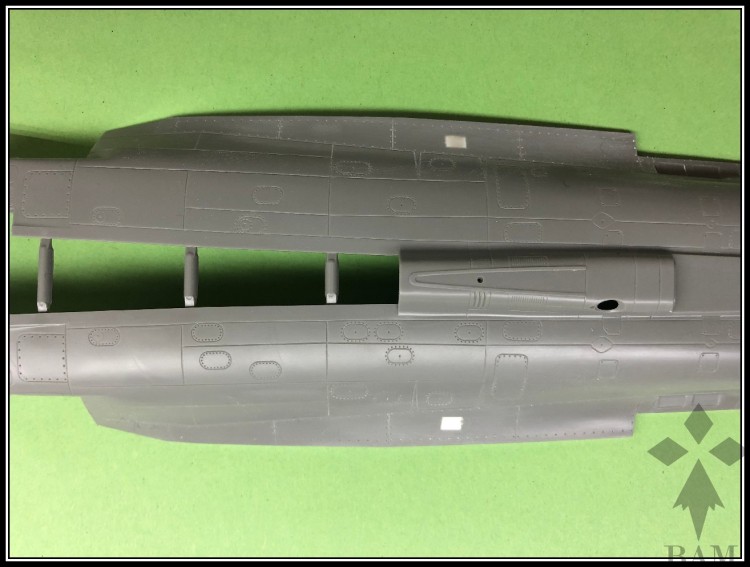
Side grills
In order to improve the grills located on either side of the fuselage you need to
Fill the existing grills
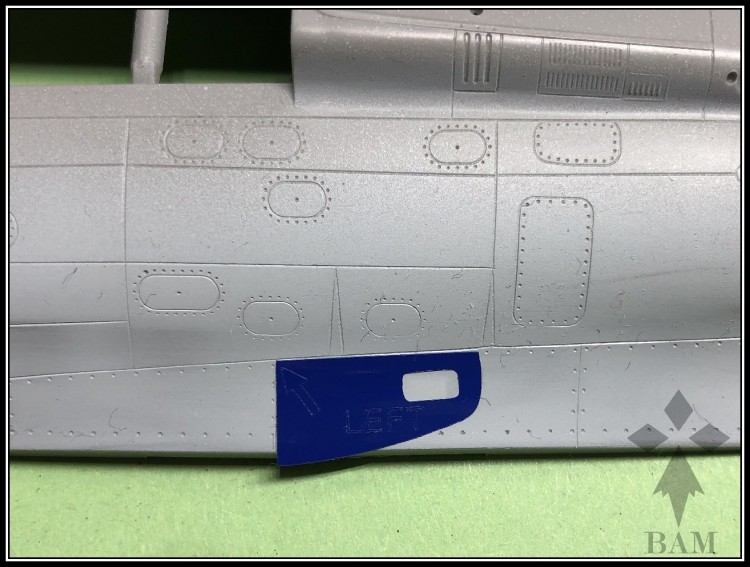
Position the jigs as shown below – the arrow engraved on each jig shows the upper forward corner where the jig needs to be aligned with the kit’s engraved panel
Drill and file the shape as shown by the jig
Insert the grill resin part on the inside – make sure you don’t remove the casting plug as it is precisely sized to make the grill flush with the fuselage!
Stick the surrounding plate, you’re done!
Original kit upper fuselageFill existing grills, including oval engravingLocate right jig and drill/file grill shapeLocate left jigs and drill/file grill shapesSide grills
F3/F3R VHF antenna
Original kit antenna (F1/F2 standard)Cut out antenna and sand flush supporting plateApply the “VHF” jigApply update supporting plateRemove jigInsert resin part in supporting plate opening
HUD
The HUD is provided as a vacuum formed part, both plain clear and clear green to give the modeller options.
Either way, the first thing to do is to cut the top, side and diagonal flash.
Then, paint in a shade of green of your choice if you want
Dip in Future or a clear gloss varnish of your choice and let cure
Cut the bottom part of the flash and glue in position using PVA glue
HUD as included in the setCut to shape following the lines, keeping the bottom margin to manipulate the HUD if you want to paint itA clear green HUD is also included if painting clear parts is not your thing 😉
DDM-NG
Same procedure on both sides of the vertical fin
Position jig on existing panel using a piece of adhesive tape or masking tape to position the two parts of the jig togetherRemove tapeMarked hole center using the jig engravingRemove center square of jig and engrave squareDrill 2mm hole, starting with small drills and progressivly work your way up to 2mm drillPaint resin part gloss black and position it in the hole after the model painting phase is over so there is no masking to do!
Modern communication systems connect people across the world in real time, but the complexity behind phone numbers, country codes, and mobile operators is often overlooked. For many users, understanding these elements can help improve communication and reduce confusion when dealing with international contacts. e-MobileTracker is a platform designed to provide clear and structured information about these topics, making telecommunications data more accessible to everyone. One of the key advantages of the platform is its straightforward design. The website is built in a way that prioritizes clarity and ease of use, allowing visitors to quickly understand how to navigate and find the information they need. This simplicity ensures that users do not feel overwhelmed, even if they are unfamiliar with telecom terminology. Another positive feature is the practicality of the content. The platform focuses on information that is directly useful in real-life communication scenarios. Users can easily explore country codes, understand mobile number formats, and gain insights into how international dialing works. This makes the platform a helpful tool for both personal and professional communication needs. Accessibility is also a major benefit. Since the service is available online, users can access it from any device with internet connectivity. There is no need for installation or setup, which makes the experience fast and convenient. Many users value the resources available through https://e-mobiletracker.com/ because it provides a simple and effective way to access telecom-related information in a responsive and user-friendly environment. The platform is also beneficial from an educational standpoint. It helps users learn about global telecommunications systems in a way that is easy to understand. By breaking down complex topics into simpler explanations, it allows users to gradually build knowledge about how international phone systems function. This makes it suitable for students, travelers, and anyone interested in communication technology. Efficiency is another strong point. The website is designed to provide quick access to relevant information without unnecessary delays. Users can move through the platform smoothly and find what they are looking for in a short amount of time. This focus on speed and usability enhances the overall experience and makes the platform more practical for regular use. The service is also available at all times, which adds to its reliability. Users can access it whenever they need, regardless of time zones or schedules. This constant availability is particularly useful in a global communication environment where information needs can arise at any moment. Overall, e-MobileTracker offers a reliable and user-friendly solution for understanding mobile communication systems. Its combination of simplicity, accessibility, and practical value makes it a useful tool for anyone dealing with international phone numbers or interested in learning more about telecommunications structures.