These instructions are laid out along what we consider the most efficient/logical construction flow, your approach may differ
Parts that simply replace the kit parts
- Front and rear instrument panels
- GE F110-129 engines
- Vertical stabilators balancing weights/antennae (Drop-fit for the GWH kit, other kits require removal of the molded-in parts). Note: these parts are directly 3D-printed in rather fragile resin
- Tiger Eyes IRST (please remove the casting sprue carefully so as not to remove the locating pins!!)
- CFT pylons (Be careful removing the casting blocks, these parts are quite thin on the upper edge)
Upper fuselage antennae
Reference picture: note that the small antenna on the upper left fuselage only applies on the F-15SG version

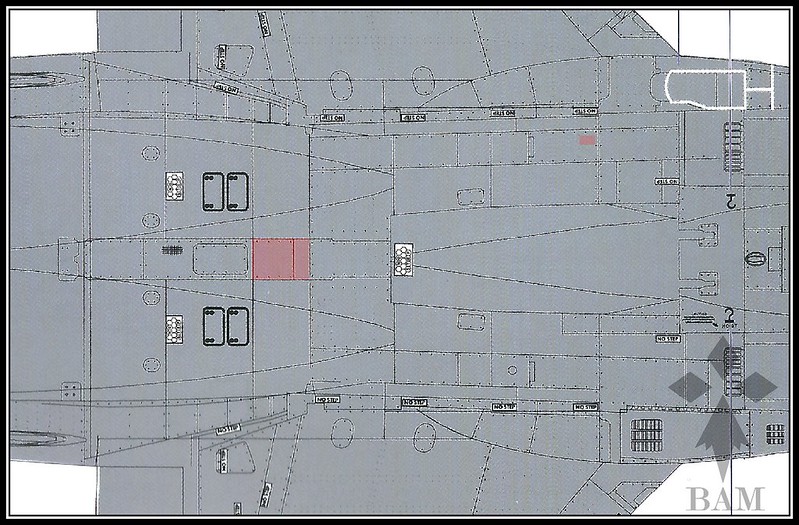
First, cut the upper fuselage as shown below for the large GPS antenna behind the speedbrake. Note the small pink area showing the location of the F-15SG antenna mentionned above
MAWS tail booms
The existing booms need to be cut out. As the MAWS booms have a different profile than the original booms the lower part of the vertical stabilators will also need to be adjusted to match this profile.
- The cuts should be done once the halves are glued together to ensure top/bottom alignement
- Cut as close to a vertical plane as possible, and start by cutting about 1mm aft of the indicated panel lines so you have room to progressively file/cut excess material and achieve perfect fit
- Once the tail booms are glued on, mask the surrounding areas, fill any gap with modelling putty and once dry remove any excess with nail varnish remover or diluted acetone
The GWH kit needs to be cut vertically along the side (outer) panel line

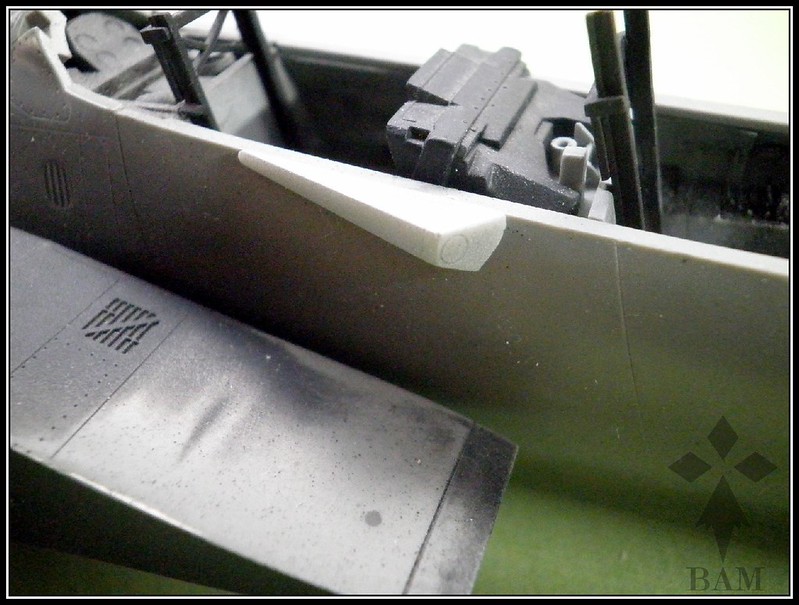
MAWS antennea on cockpit sides
The antennae should be fixed flush with the edge of the cockpit, their front edge 22.5mm aft of start of the main canopy slot


CFT pylons
The CFT elongated pylons replace the regular pylons in the GWH and Revell-Monogram kits


The hooks are provided with a spare or two just in case. Simply take them off the casting block, lightly sand the base and slide them in the dedicated pylon slots


Small CFT scoops


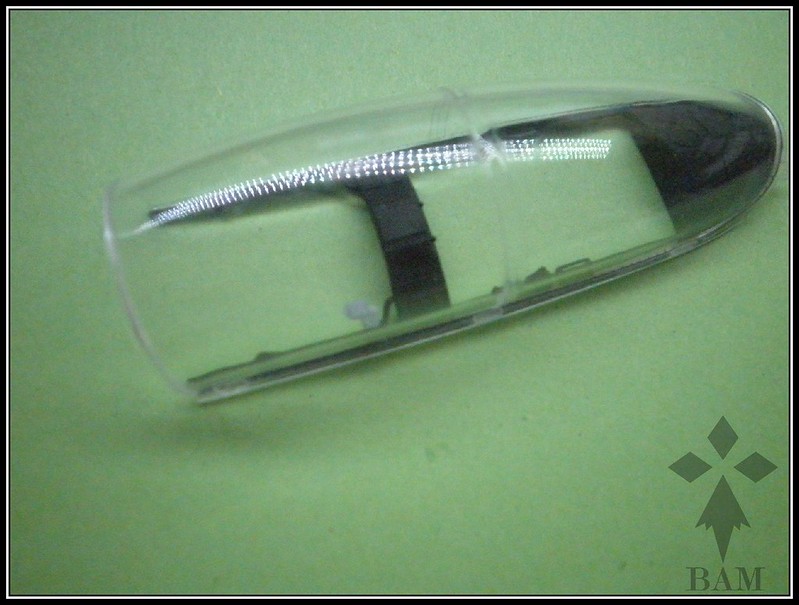
JHCMS Magnetic Tracking Unit (MTU)
This part should be glued inside the canopy on the canopy frame just forward of the large bracing